Build the Skirt First
Start with the seafoam dress and add soft volume underneath. The goal is movement—not enormous ball-gown width.
Polished style for women over 40
SeaEscape Halloween Style · 2026
Dress beautifully. Be unexpected. Have fun.
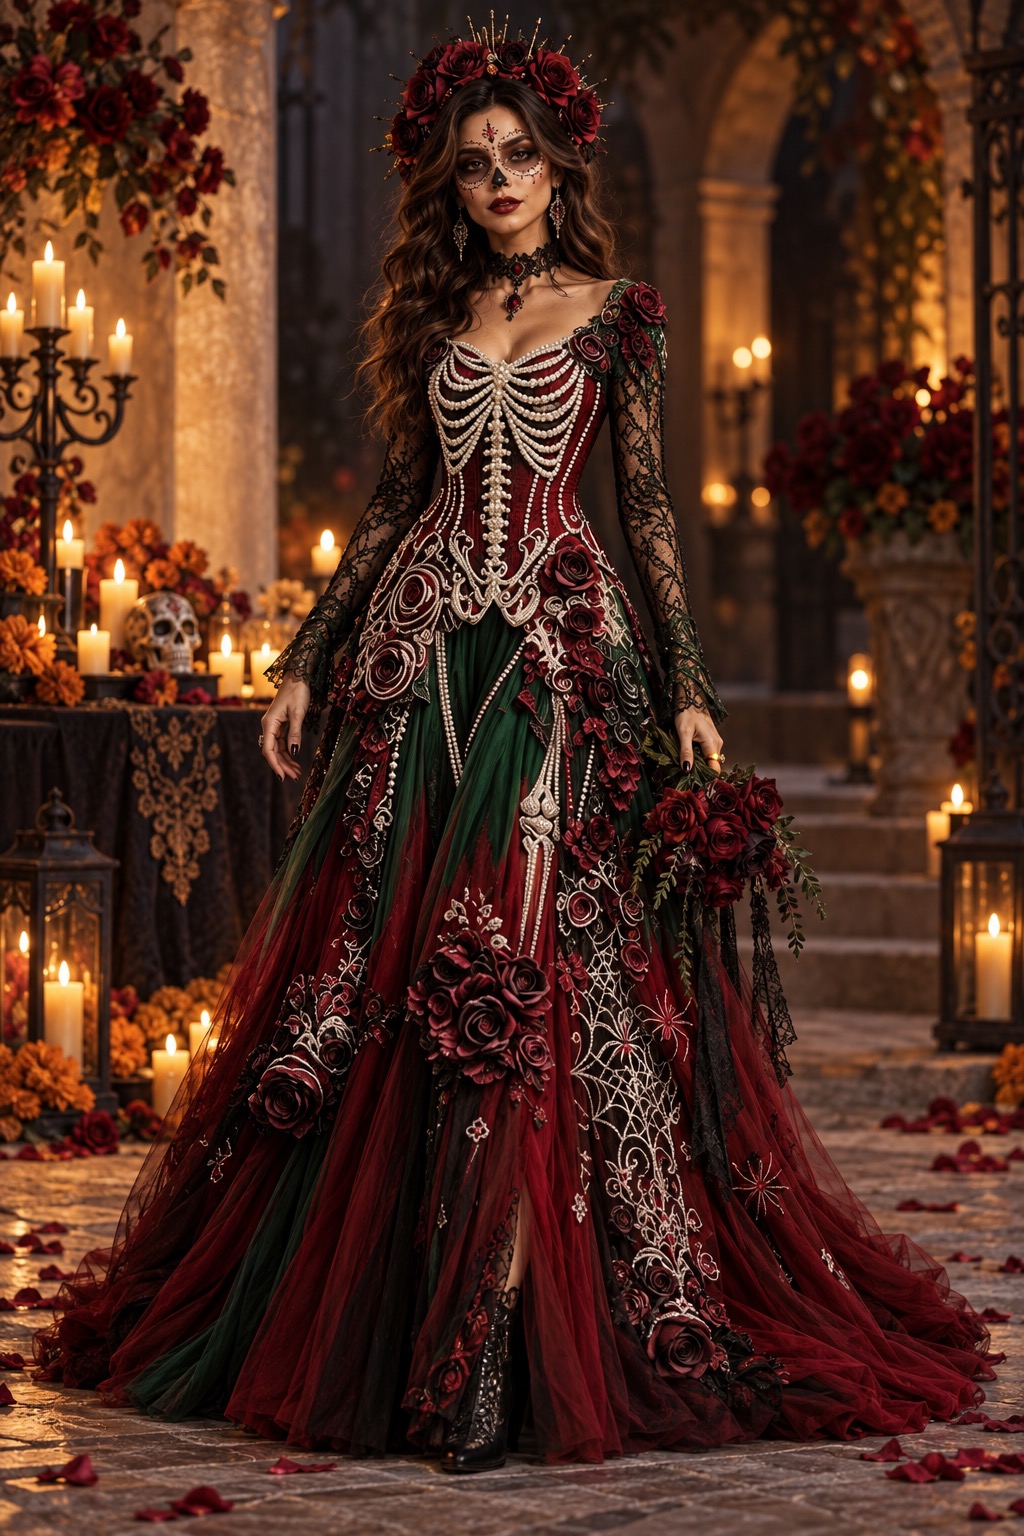
Forget the flimsy costume aisle. These looks begin with beautiful clothing and become Halloween through texture, layering, accessories and imagination. Better yet, the individual pieces can be found on Amazon and assembled into a look that feels personal, elegant and completely unexpected.
Start with a beautiful outfit. Then tell a story.
Halloween Style for Grown Women
The easiest way to create a memorable Halloween costume is to style it exactly as you would any SeaEscape edit: establish a strong foundation, choose a controlled color story, add texture, define the waist, frame the face and finish with one unmistakable storytelling detail.
Each featured look below begins with real clothing and attainable pieces. Build the silhouette first, then layer the fantasy over it.
Featured Halloween Style Edit
Mystical. Romantic. Weathered by the sea.
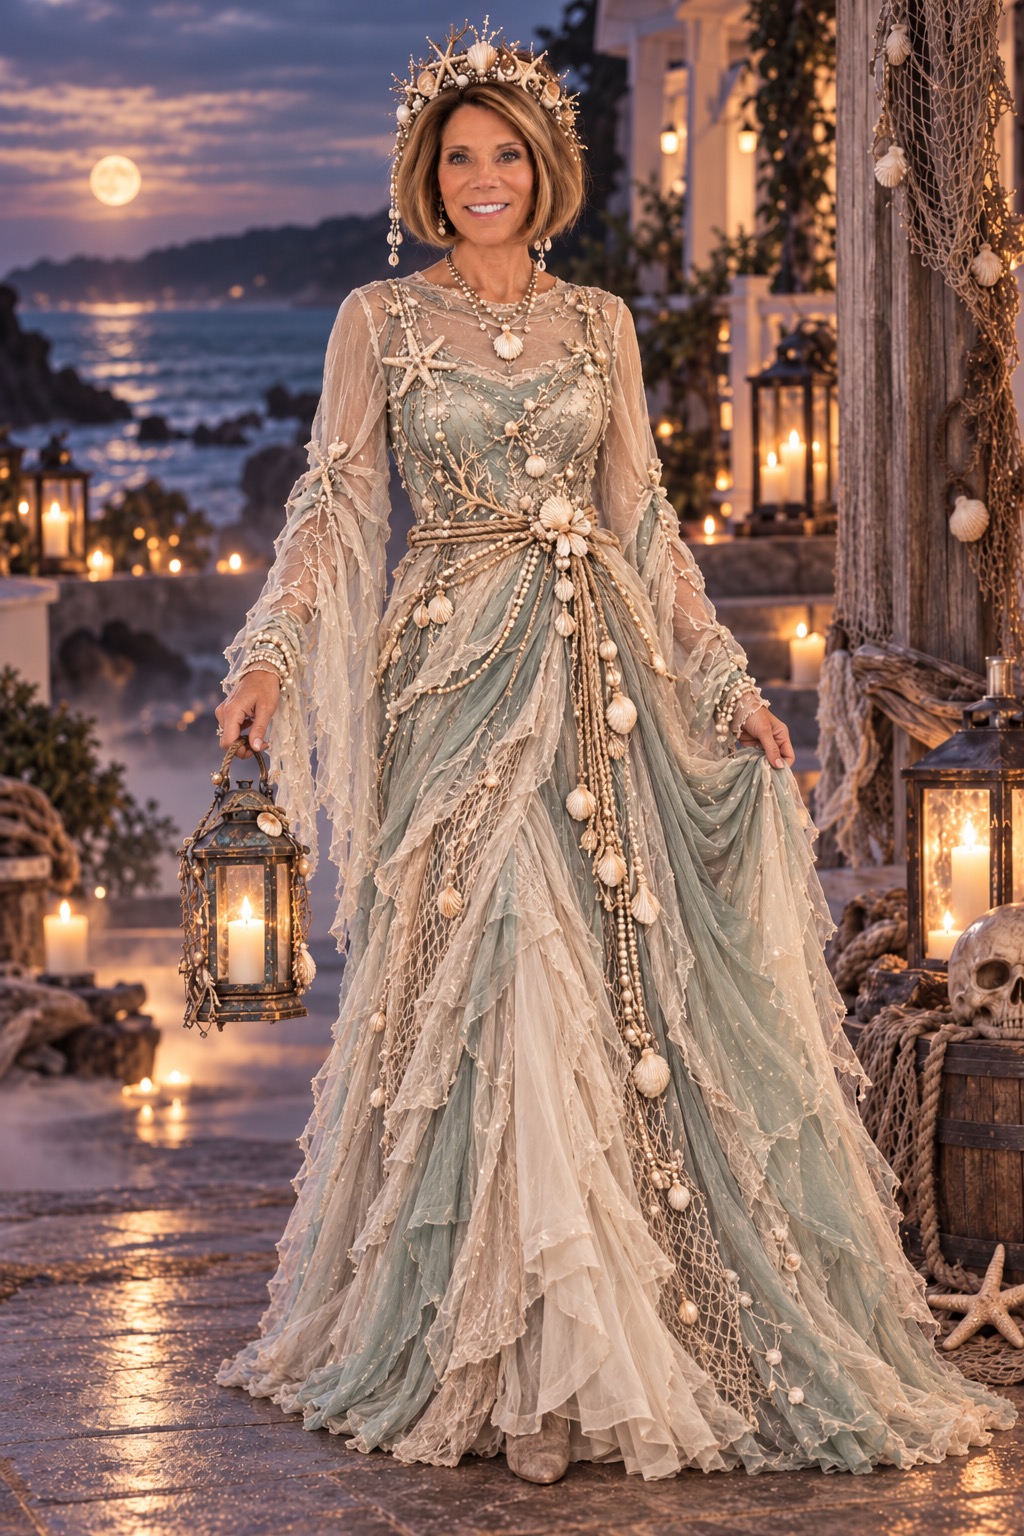
The Sea Queen is not a mermaid costume. She is part ocean goddess and part beautifully shipwrecked dreamer. A soft seafoam or oyster dress creates the polished foundation, while gauze, netting, rope, shells and pearls make the outfit feel as though it has emerged from the sea.
Stay with seafoam, faded sage, champagne, ivory and natural rope. Instead of adding more colors, add more texture.
Avoid a bright turquoise mermaid dress and plastic seashell accessories. Choose muted colors and natural-looking materials.
Complete Step-by-Step Instructions
Build volume first, add irregular translucent layers, define the waist, then finish with restrained shells, pearls and tiny points of shimmer.
Start with the seafoam dress and add soft volume underneath. The goal is movement—not enormous ball-gown width.
Gently stretch the gauze, pull selected edges and allow some of the fabric to wrinkle naturally.
Weave narrow sections of aqua net through the gauze and add vertical streams of shells and pearls.
Use champagne, pearl or pale-gold sparkle only on selected areas. Large sections should remain matte.
Drape the sheer layer from one shoulder toward the opposite hip and echo that line with pearls.
Wrap natural rope around the waist two or three times and tie it slightly off center.
Add pearls, shells and small sea details toward the center so the headpiece grows upward rather than outward.
Keep the beauty look moonlit and polished. Finish with a battery-operated lantern.
Shop the exact SeaEscape-selected pieces below.
Shop the Sea Queen Pieces ↓Shop the Pieces
Build the foundation first, then add translucent texture, shells, pearls and the finishing accessories.
Foundation
One of the two SeaEscape-selected dress foundations.
Shop Dress Option 1 →Foundation
Choose the version that gives you the best fit and movement.
Shop Dress Option 2 →Bodice
Adds translucent texture at the neckline and sleeves.
Shop the Sheer Top →Texture
Use irregular lengths for the pale weathered layer.
Shop Ivory Gauze →Texture
Layer pale mint through the ivory for subtle ocean color.
Shop Mint Gauze →Ocean Texture
Weave sections through the gauze rather than covering the gown.
Shop Aqua Net →Waist
Defines the waist and controls the soft layers.
Shop Natural Rope →Detail
Drape them diagonally and allow several strands to move freely.
Shop Pearls →Sea Detail
Use shells in edited clusters at the shoulder and waist.
Shop Clam Shells →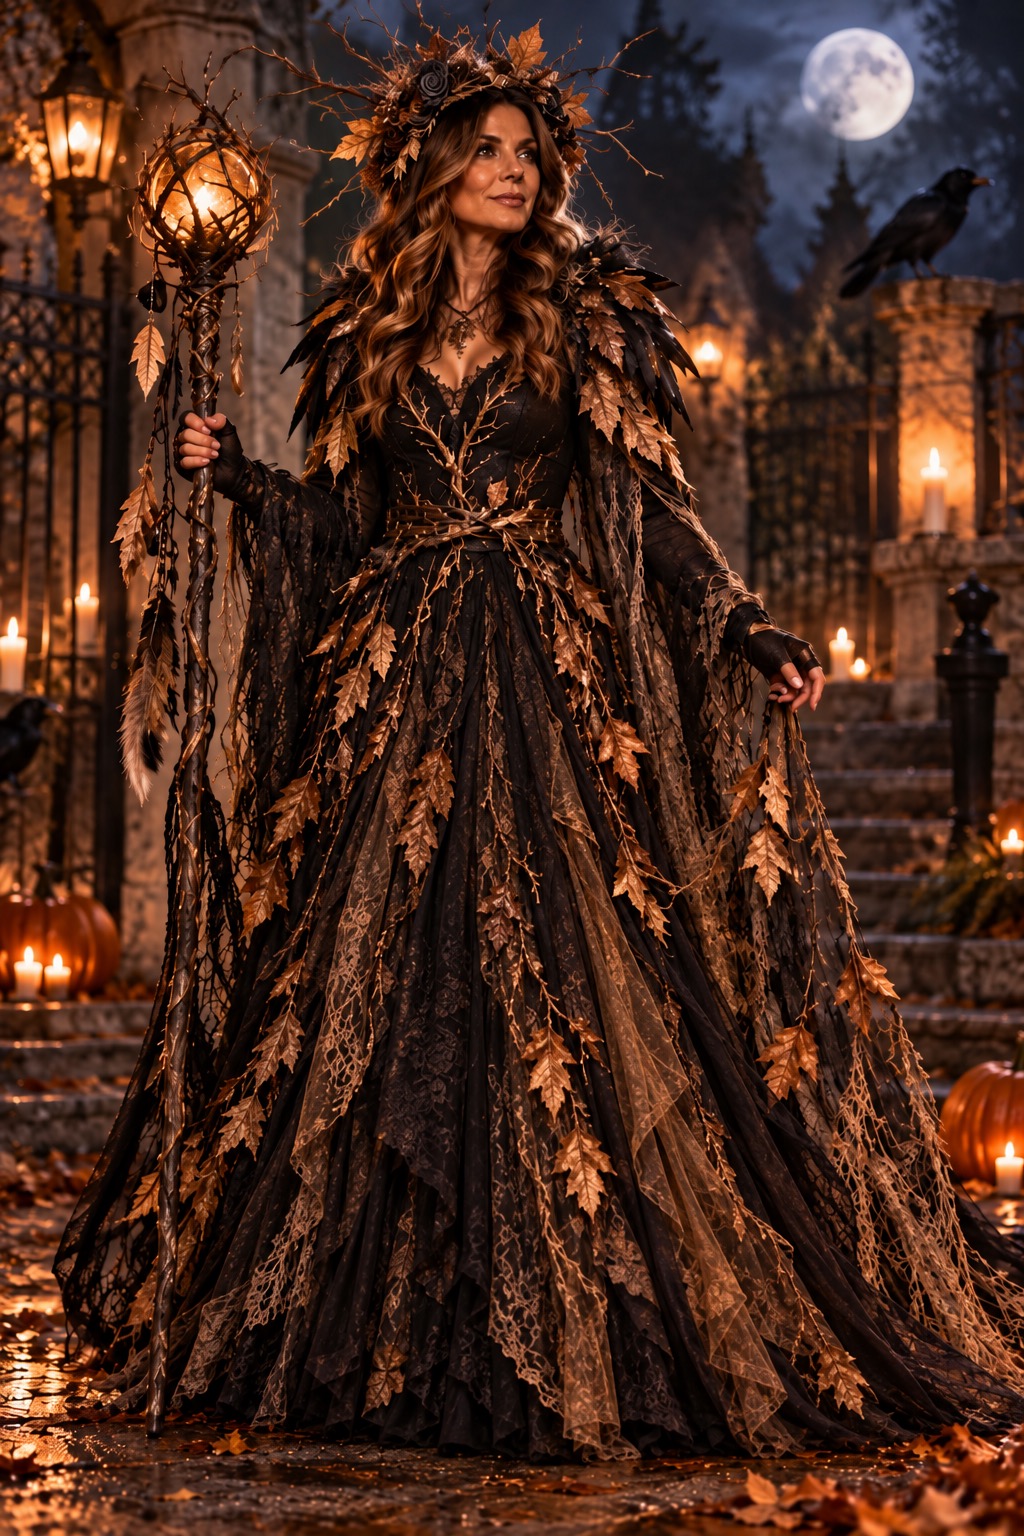
Featured Halloween Style Edit
A dark forest brought to life.
Begin with the exact black dress, a full tulle underskirt and a black cape, then build outward with brown tulle, copper foliage, sculptural branches and a glowing-looking orb staff.
The easiest method is to build the dramatic decoration as removable pieces. That keeps the dress and cape wearable and makes the entire costume far easier to assemble.
Keep large uninterrupted areas of black visible. Concentrate the drama at the crown, shoulders, waist and staff.
Complete Step-by-Step Instructions
Create removable decorative elements for the crown, shoulders, waist and staff instead of permanently attaching everything to the dress.
Lightly mist the artificial leaves with copper paint. Leave some brown and bronze variation. Glitter only selected leaves, then seal.
Spray the decorative sticks unevenly with copper paint and add glitter only to selected branch tips.
Wire three short branches together for each shoulder, fan them upward and backward, and attach them to the cape rather than the dress.
Build the branches toward the back half of a headband and keep the face open.
Put the tulle skirt underneath the black dress. Use it for fullness, not enormous width.
Use two or three asymmetrical panels at the waist. Reserve the embroidered fabric for the most visible panel.
Create a narrow leaf belt, then trail smaller clusters downward. Leave lots of black showing.
Build a branch nest around the upper staff and secure the orb with clear line or floral wire.
Shop the exact pieces selected for the Autumn Enchantress.
Shop the Autumn Pieces ↓Shop the Pieces
Start with the dress, cape and tulle base, then add the removable woodland elements.
Foundation
The exact black dress selected for the costume.
Shop the Dress →Outer Layer
Holds the dramatic removable branch shoulder pieces.
Shop the Cape →Underlayer
Wear underneath the black dress for controlled fullness.
Shop the Tulle Skirt →Overlay
Create two or three loose asymmetrical panels.
Shop Brown Tulle →Luxury Overlay
Reserve for the most visible brown outer panel.
Shop Leaf Fabric →Foliage
Use for the waist, shoulders, crown and staff.
Shop Copper Leaves →Accent
Mix with the copper leaves for depth and realism.
Shop Oak Leaves →Structure
Use for shoulder sprays, crown and orb nest.
Shop the Sticks →Prop
Build the branch nest around the upper section.
Shop the Staff →Prop Detail
Secure inside the branch nest with clear line.
Shop the Orb →Sparkle
Use only on selected leaves and branch tips.
Shop Glitter 1 →Sparkle
Pair with copper paint from a local hardware store.
Shop Glitter 2 →Tulle first, then the black dress and brown overlay.
Add waist leaves, shoulder sprays, cape and crown.
Add the staff and orb, then remove excess decoration if needed.
Featured Halloween Style Edit
Webs. Shadow. A little danger. Completely elegant.
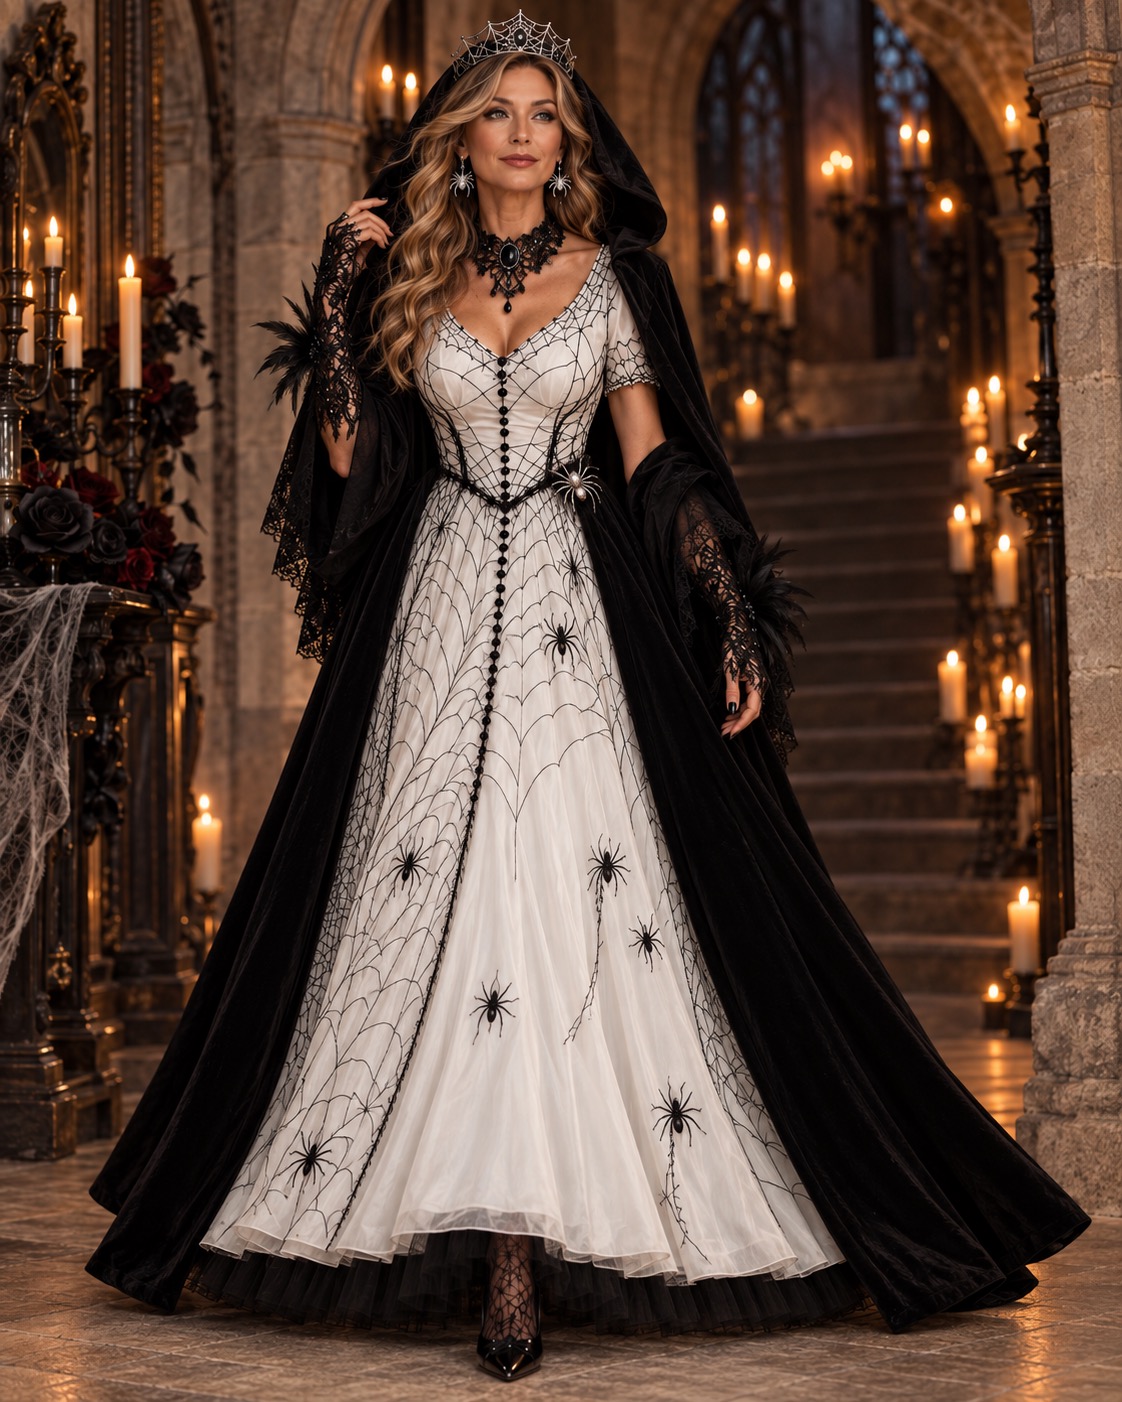
The Black Widow Temptress begins with the exact white spiderweb-print dress, then transforms it with a full black tulle skirt underneath and a dramatic black robe around it.
The white dress remains clearly visible while the black robe, spider headpiece, neckpiece, gloves, tights and carefully chosen spider jewelry create the darker Black Widow story.
The exact white dress is the centerpiece. Do not bury it beneath black fabric. The robe should frame it and the accessories should feel like sophisticated jewelry—not novelty props.
Complete Step-by-Step Instructions
This look is dramatic but surprisingly easy: build the fullness underneath the exact white dress, frame it with the black robe, then add the headpiece, neckpiece, gloves, tights and spider jewelry.
Use the exact white spiderweb-print dress as the visible foundation of the outfit. Steam it first so the bodice and skirt hang smoothly.
The web pattern already establishes the theme, so everything else should enhance—not hide—the dress.
Wear the linked tights beneath the costume. They provide a second web detail when the dress moves or the skirt opens slightly.
Keep this detail subtle. The tights support the dress rather than compete with it.
Put the black tulle skirt on before the white dress. The tulle creates the fuller gothic silhouette while allowing the real dress to remain the visible outer layer.
A small amount of black tulle can peek from the bottom of the dress for contrast.
Put the black robe over the white dress and leave it open through the front.
Let the black fabric fall behind the shoulders and down the sides so the lighter spiderweb dress remains clearly visible through the center.
Position the linked headpiece so the web-inspired shape shows clearly against the hair and black robe.
Keep the face open. The effect should be regal and elegant before it reads theatrical.
Add the linked neckpiece close to the neck so it frames the white dress without covering too much of the printed bodice.
Because the neckline is already dramatic, do not add another large necklace.
Put on the black gloves to carry the dark theme down onto the hands. Add the linked spider jewelry as the statement hand or wrist detail.
Black or deep wine nails work beautifully. Keep additional bracelets minimal.
The linked spider earrings echo the headpiece and create one final detail near the face.
This is enough. The costume does not need another large prop to explain the character.
Wear hair loose and softly waved or swept back enough that the headpiece and neckpiece remain visible.
Use softly smoky eyes, defined lashes, luminous skin and a deep berry, wine or muted dark lip.
The shopping guide below uses all of the exact products selected for the Black Widow Temptress.
Shop the Black Widow Pieces ↓Shop the Exact Pieces
Keep the exact white dress visible, build fullness underneath with black tulle, then frame the look with the black robe, headpiece and spider accessories.
Foundation
The exact white spiderweb-print dress is the visual anchor of the entire Black Widow look.
Important: keep the dress clearly visible beneath the robe.
Shop the White Dress →Outer Layer
The black robe creates the sweeping dark frame around the lighter spiderweb dress.
Wear: open at the front so the dress stays visible.
Shop the Black Robe →Volume
Wear the full black tulle skirt underneath the white dress to create a fuller gothic silhouette.
Placement: under the dress, never over it.
Shop the Tulle Skirt →Headpiece
Use the black spider headpiece as the regal focal point around the face.
Keep: the face open and clearly visible.
Shop the Headpiece →Neckline
The neckpiece frames the neckline and gives the upper half a richer gothic finish.
Best styling: keep it close to the neck.
Shop the Neckpiece →Jewelry
Use the spider jewelry as one strong statement detail rather than layering novelty accessories.
SeaEscape rule: one beautiful spider focal point is enough.
Shop the Spider Jewelry →Face Detail
Dark spider earrings create an elegant focal point near the face and echo the headpiece.
Keep: the rest of the jewelry edited and intentional.
Shop the Spider Earrings →Hands
The gloves carry the dark web effect onto the hands and make the outfit feel finished.
Finish with: black or deep wine nails.
Shop the Gloves →Leg Detail
Wear the tights beneath the dress so another subtle web detail appears when the skirt moves.
Keep subtle: they support the dress instead of competing with it.
Shop the Tights →Put on the spiderweb tights and black tulle first, then layer the exact white dress over them.
Add the black robe, headpiece and neckpiece without covering the white dress.
Finish with the gloves, spider jewelry and earrings. No additional large prop is necessary.
The SeaEscape Halloween Rule
Build a beautiful outfit first.
Then make it magical.
You do not need a revealing costume, heavy makeup or a pile of novelty accessories. One controlled palette, a beautiful silhouette, thoughtful layering and one unmistakable storytelling detail can create far more impact.
More Halloween Magic
Keep exploring SeaEscape Halloween ideas with four more sophisticated directions—from ocean-dark romance to celestial black and antique gold.
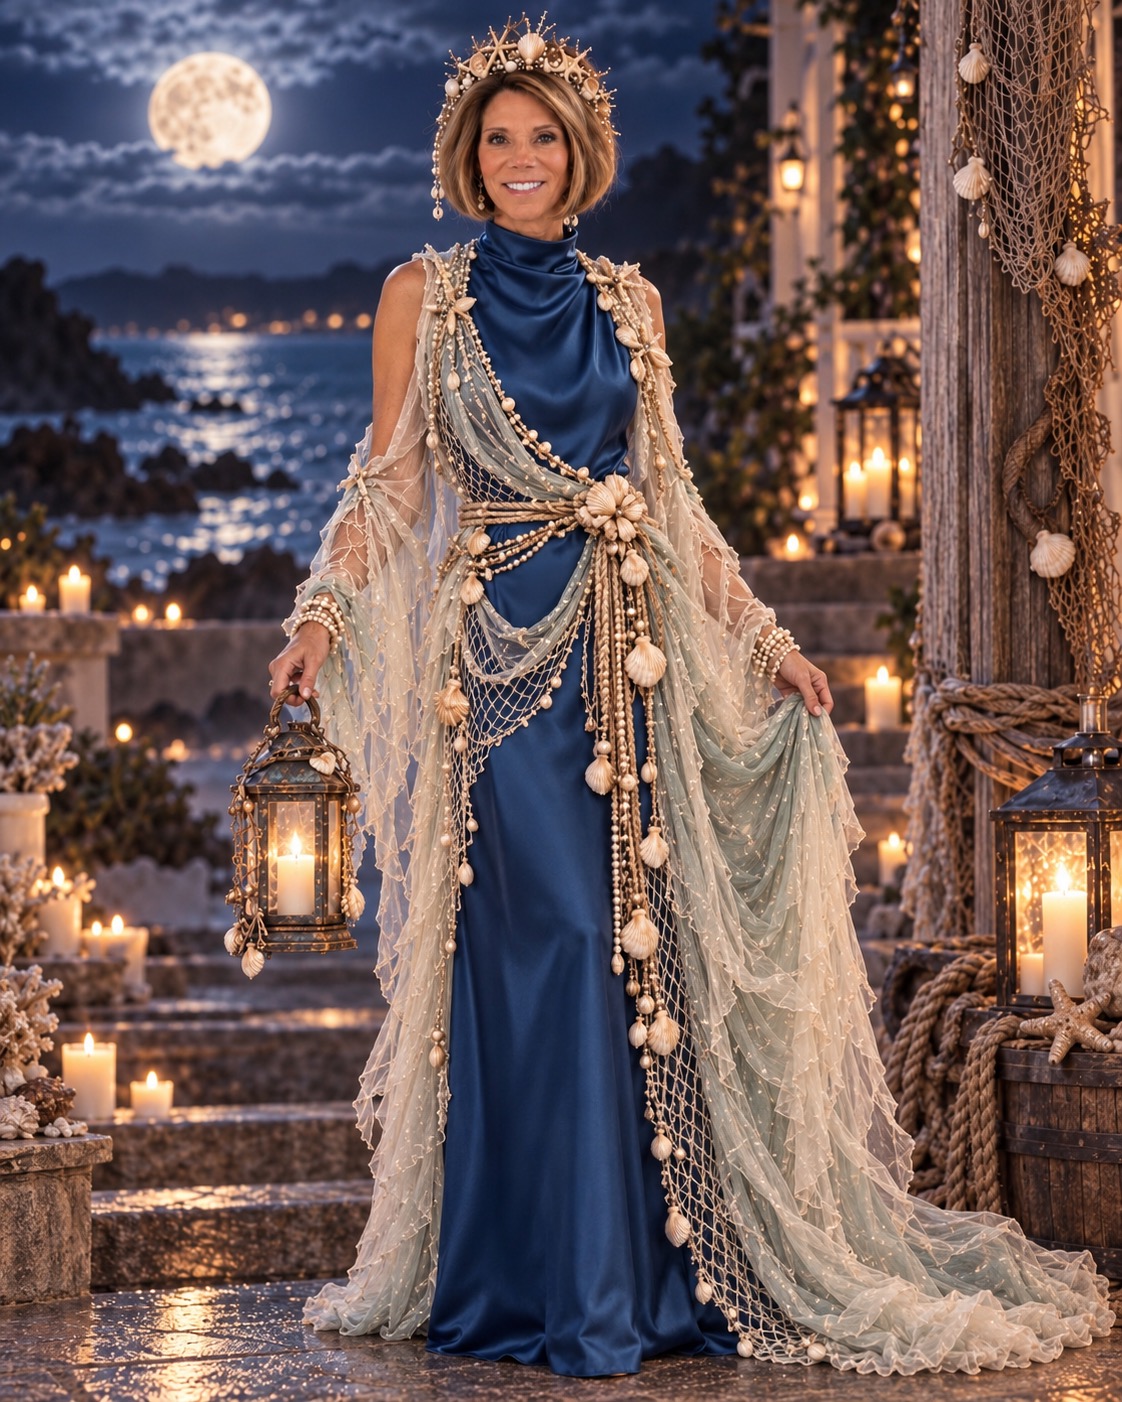
Ocean After Dark
Sapphire satin, pale netting, pearls and shells turn the sea theme into a dramatic evening look.
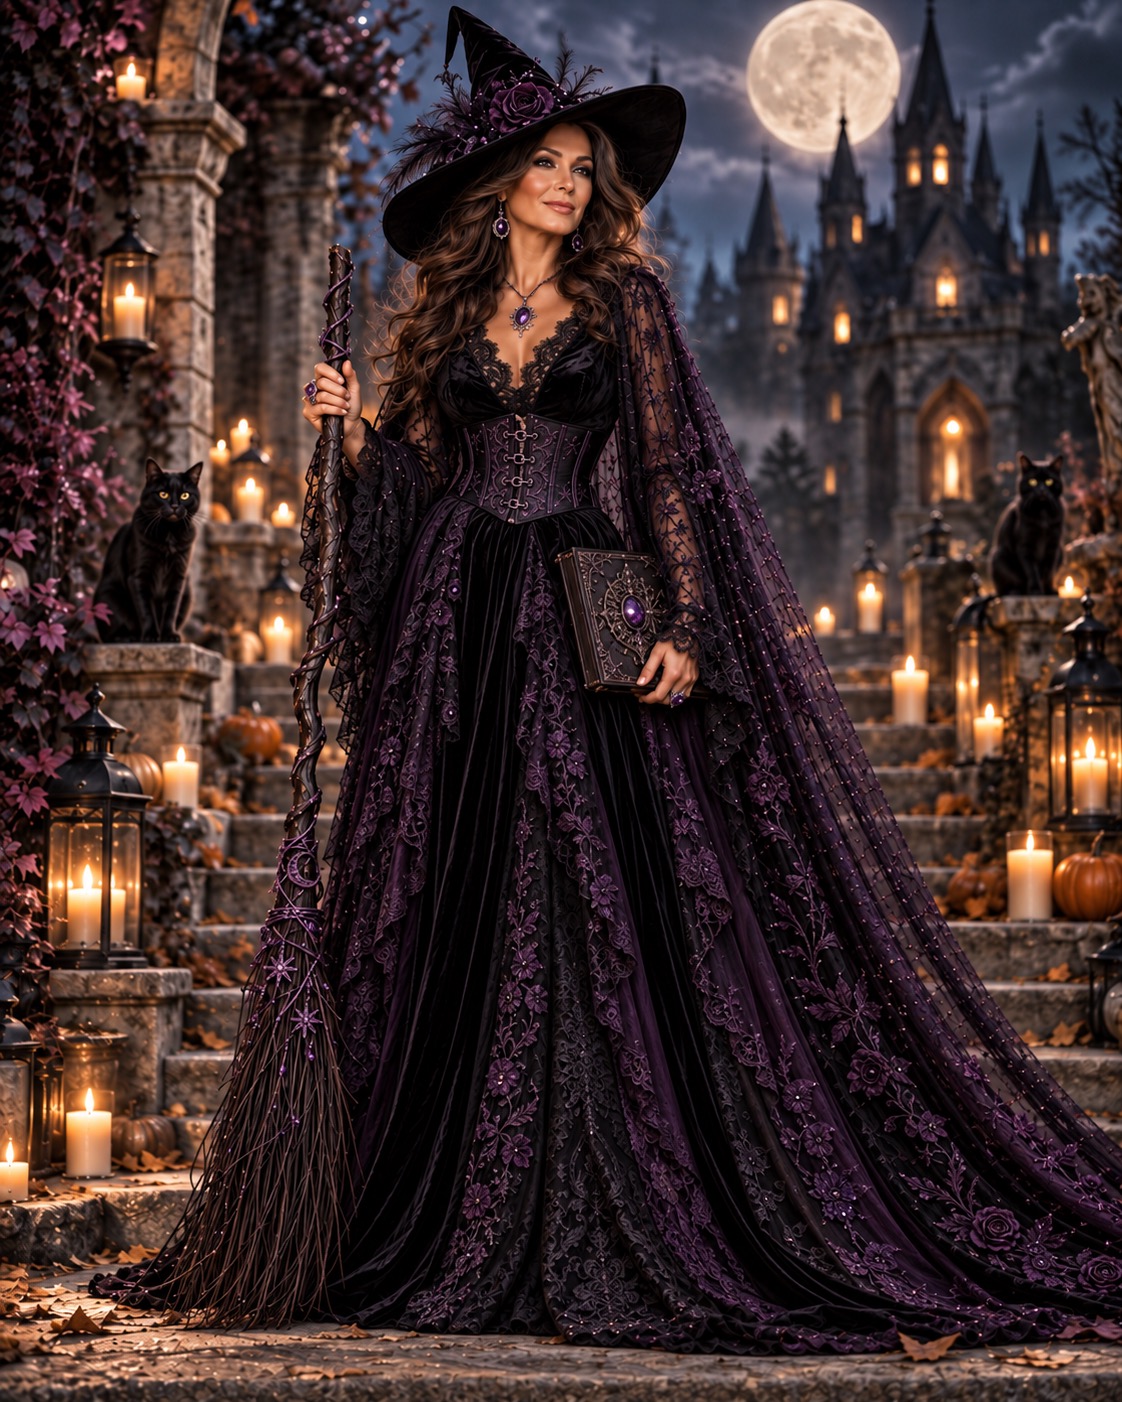
Gothic After Dark
Deep violet, black lace and a long silhouette give the classic witch a richer, more polished identity.
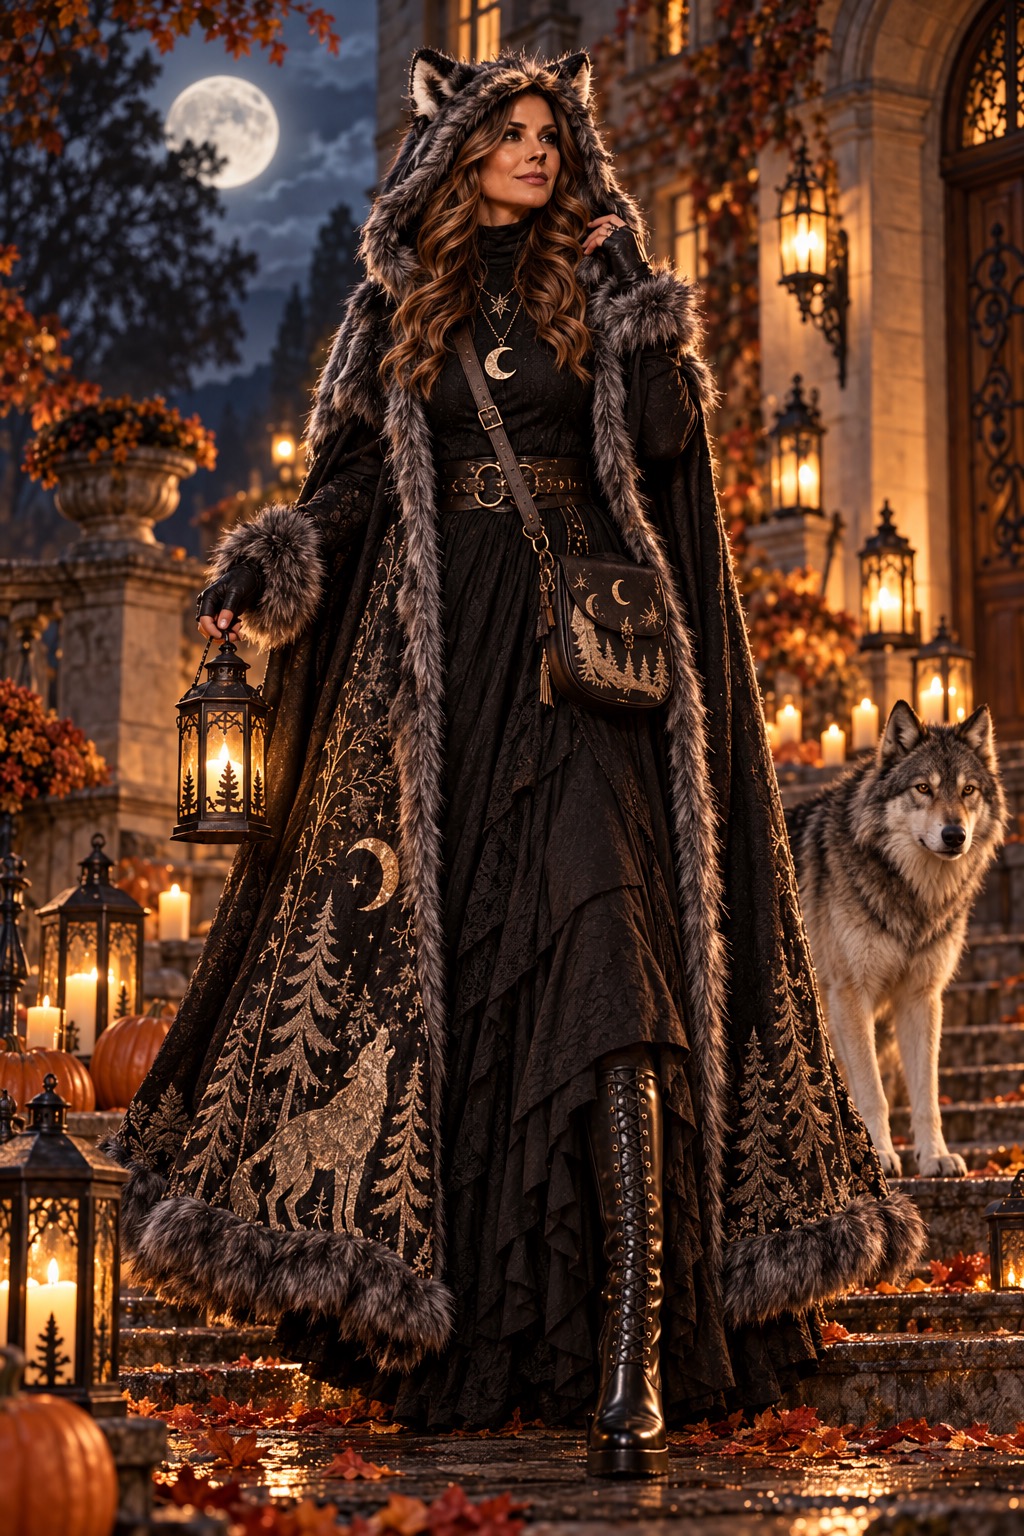
Wild Heart
Charcoal layers and faux fur make the Moonlit Wolf dramatic, comfortable and ideal for a cooler evening.
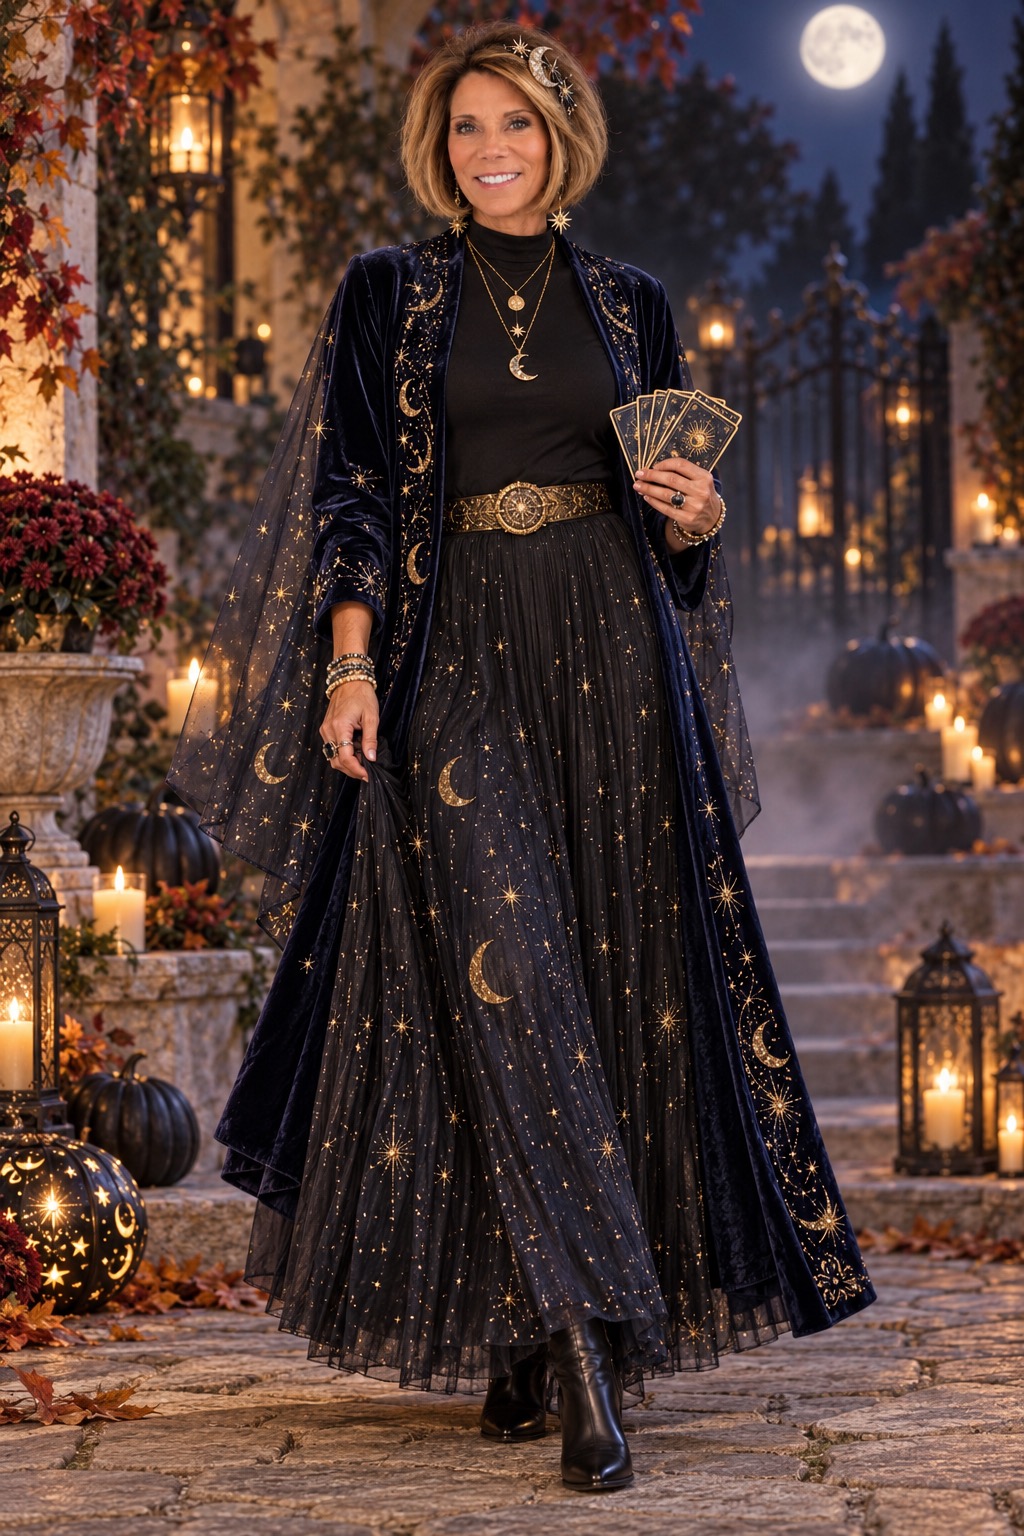
Midnight Constellations
Black, antique gold and celestial details create a mysterious evening look with just enough shimmer to catch the light without losing its sophistication.
SeaEscape Well Styled independently selects and styles the ideas featured on this page. Amazon links are provided to help locate the featured pieces. Availability, sellers, colors and pricing may change. Read our Affiliate Disclosure.
Be elegant · Be playful · Be unexpected